Discover the ultimate 10-step dashcam installation guide for beginners! Learn how to set up vehicle cameras effortlessly, enhance road safety, and protect your car with this comprehensive guide.
A dashcam is no longer a luxury but a necessity in modern vehicles. It protects you from fraudulent claims, documents road trips, and provides peace of mind. However, many drivers hesitate to invest in vehicle cameras due to concerns about the complexity of installation. The good news is that dashcam installation is a straightforward process, and with this comprehensive Axel-Guard provide step by step dashcam setup guide, anyone can do it. Whether you’re a complete beginner or have some technical knowledge, this guide will walk you through every step, ensuring your vehicle cameras are installed perfectly.
Why Dashcam Installation Matters
Dashcams are more than just fancy gadgets; they are indispensable tools that enhance road safety and vehicle security. Here’s why dashcam installation is important:
- Accident Evidence: In case of a collision, dashcams provide indisputable video evidence to clarify liability.
- Fraud Prevention: Protect yourself from staged accidents or fraudulent insurance claims with reliable footage from your vehicle cameras.
- Parking Surveillance: Advanced dashcams can monitor your car while parked, offering added protection against theft or damage.
- Driver Monitoring: Dashcams with GPS track routes, speed, and driving behavior, which is useful for fleet management or parental oversight.
- Memorable Moments: Document road trips or scenic drives for personal memories or social sharing.
Now that you know the benefits of vehicle cameras, let’s proceed with the dashcam setup guide.
Step-by-Step Dashcam Installation Guide
Step 1: Choose the Right Dashcam
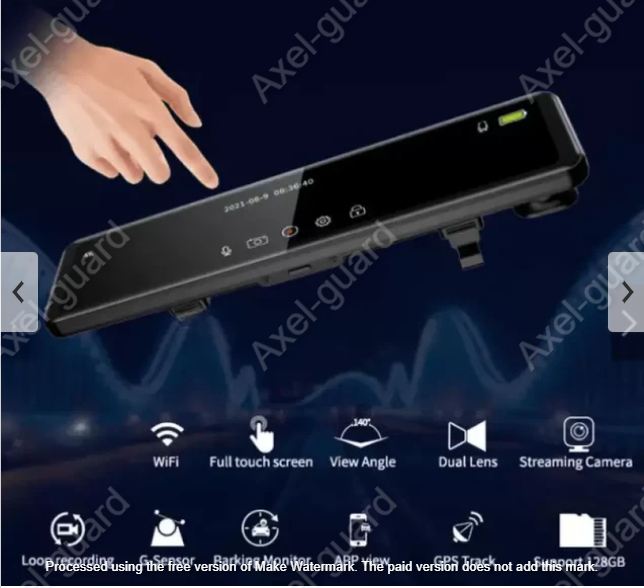
Begin your dashcam installation by selecting a device that meets your needs. Consider these features:
- Video Quality: Look for Full HD (1080p) or 4K resolution for sharp, clear footage.
- Night Vision: Ensures visibility in low-light conditions.
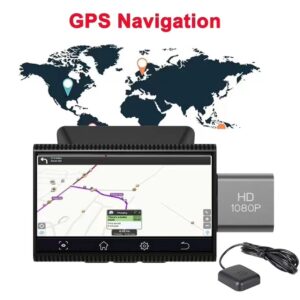
- GPS: Tracks your location and speed.
- Parking Mode: Monitors your car while it’s parked.
- Wide Viewing Angle: Captures more of the road.
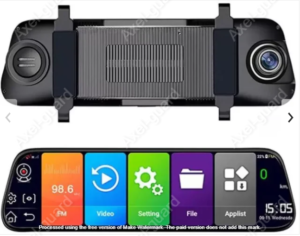
- Mobile App Support: Lets you view and manage recordings via your smartphone.
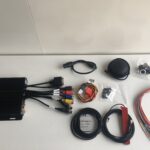
Step 2: Gather Installation Tools
Before starting, gather all the tools needed for a smooth dashcam installation:
- Dashcam unit
- Adhesive pads or suction mount
- Power cable or hardwiring kit
- MicroSD card
- Cable clips or zip ties
- Alcohol wipes (to clean the windshield)
- Optional tools: pry tools, screwdriver
Step 3: Select the Mounting Position
Proper placement is key to an effective dashcam setup guide. Most users prefer mounting the dashcam behind the rearview mirror. This position provides a clear view of the road without obstructing the driver’s line of sight.
Step 4: Secure the Dashcam Mount
- Adhesive Mount: Clean the windshield with alcohol wipes, peel off the adhesive backing, and attach the mount firmly.
- Suction Mount: Press the suction mount against the windshield, adjust the angle, and lock it in place.
Step 5: Connect the Dashcam to Power
- Cigarette Lighter Adapter: Plug the power cable into your car’s cigarette lighter socket. This is the easiest method and ideal for beginners.
- Hardwiring Kit: For a cleaner installation and access to parking mode, connect the dashcam directly to the car’s fuse box.
Step 6: Route the Power Cable
Neatly tuck the power cable along the edges of the windshield and dashboard using cable clips or trim panels. This ensures a professional-looking dashcam installation and prevents loose wires from interfering with your driving.
Step 7: Insert and Format the MicroSD Card
A compatible MicroSD card is essential for recording. Insert the card into the dashcam, then format it using the device’s settings menu. High-endurance MicroSD cards are recommended for long-term reliability.
Step 8: Adjust the Dashcam Angle
Use the live preview feature on the dashcam or its mobile app to adjust the camera’s angle. Ensure it captures the road ahead, focusing slightly above the horizon for the best coverage.
Step 9: Test the Dashcam
Turn on your vehicle to verify that the dashcam powers up automatically. Check recording quality, GPS functionality, and parking mode settings.
Step 10: Finalize and Secure Installation
Double-check all connections and secure loose wires. Confirm the dashcam is functioning as intended before hitting the road.
Common Mistakes to Avoid During Dashcam Installation
- Improper Placement: Mounting the dashcam in a location that obstructs the driver’s view or captures poor footage.
- Skipping Cable Management: Leaving cables untidy can lead to distractions or damage over time.
- Using Low-Quality Memory Cards: Always use high-endurance cards designed for continuous recording.
- Ignoring Local Laws: Some regions have restrictions on dashcam placement, so ensure compliance.
Pro Tips for Maintaining Your Vehicle Cameras
- Clean the dashcam lens regularly to maintain clear recordings.
- Update the dashcam firmware for improved performance and new features.
- Periodically format the MicroSD card to prevent file corruption.
- Check the dashcam’s recording status to ensure it’s working as expected.
- Test parking mode settings periodically to confirm they’re active.
FAQs About Dashcam Installation
1. Can I perform a dashcam installation myself?
Yes, this dashcam setup guide is designed for beginners to install their own vehicle cameras without professional help.
2. Where should I position my dashcam?
The ideal position is behind the rearview mirror, ensuring an unobstructed view of the road.
3. Do I need to hardwire my dashcam?
Hardwiring is optional but recommended for a cleaner setup and to enable features like parking mode.
4. Can I install dashcams in older vehicles?
Yes, dashcams are compatible with all types of vehicles, regardless of age or model.
5. Will a dashcam drain my car battery?
When installed correctly, dashcams consume minimal power. A hardwiring kit with a voltage cutoff ensures your car battery remains safe.
6. Can I move my dashcam between vehicles?
Yes, most dashcams are portable and can be easily transferred to other vehicles.
7. What type of MicroSD card is best for dashcams?
High-endurance MicroSD cards are recommended for continuous recording and durability.
Stay Connected with Axel-Guard
For the latest updates on dashcam installation, tips on maintaining your vehicle cameras, and exclusive product launches, follow Axel-Guard on social media:
- Facebook: Discover product updates, installation tips, and customer stories.
- Twitter: Join discussions and get quick insights on vehicle safety.
- Instagram: See how others are using Axel-Guard dashcams to stay secure.
- LinkedIn: Connect with us for professional insights and industry news.
Conclusion
Dashcams are a valuable addition to any vehicle, offering protection, security, and peace of mind. This dashcam setup guide ensures that even beginners can install their vehicle cameras efficiently and without hassle. From selecting the right device to finalizing your installation, every step is simple and easy to follow.
Invest in a dashcam today and drive with confidence knowing you’re protected at all times. Share this guide with friends and family, and encourage them to embrace the benefits of reliable dashcam installation!
Pingback: Top 7 Best Budget Dashcams for Private Cars in India - AxelGuard